
The Cybersecurity Career Newsletter Issue #3 Written By Marius Poskus
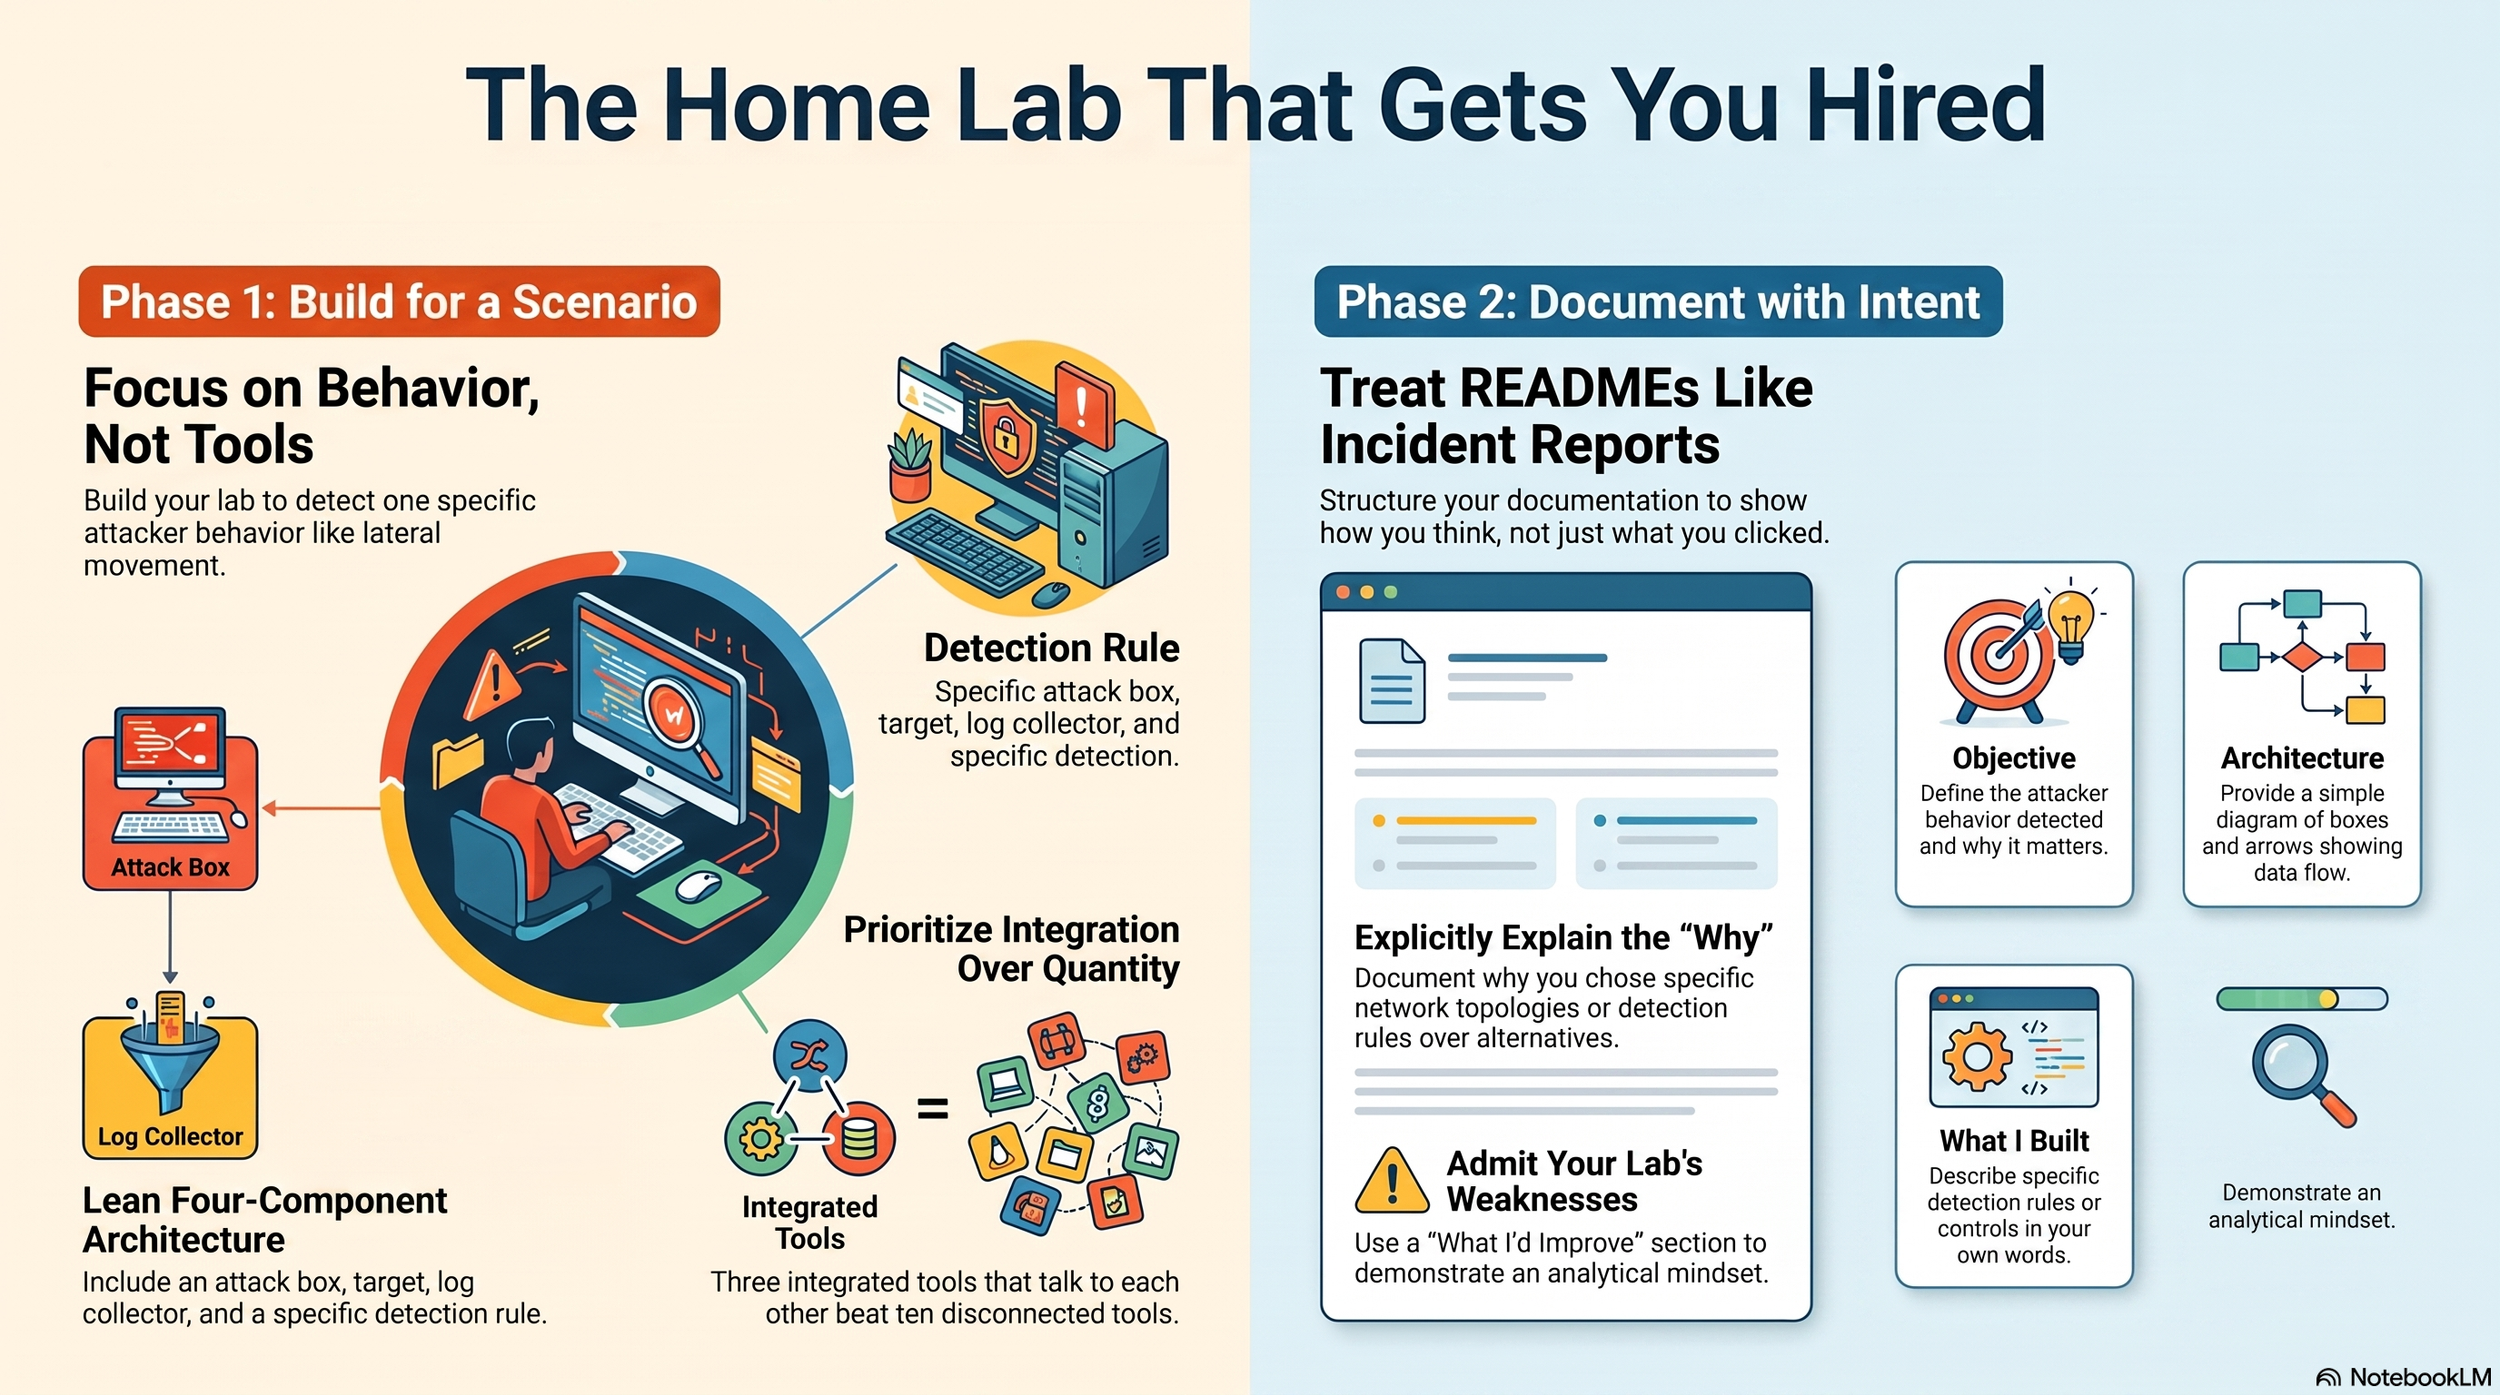
The Home Lab That Gets You Hired
Hey,
Quick check: did you record yourself answering "Walk me through your home lab" out loud last week? If you did and it felt clumsy, good. That's the point of the exercise. Clumsy out loud in private beats clumsy in front of a hiring manager.
This week I'm giving you the other half of that equation. Not how to talk about your lab. How to build the one that actually earns the talking-about.
🔥 THIS WEEK'S INSIGHT: The Home Lab That Gets You Hired I've looked at hundreds of home labs on GitHub. Most of them are invisible to me. Not because they're bad. Because I can't tell what they are in the 30 seconds I've allotted to look.
Here are the three mistakes that make a lab look amateur, and the one documentation approach that fixes all three at once.
Mistake 1: The screenshot dump. A repo with twelve screenshots of a Kali terminal and no explanation tells me you followed a tutorial. It doesn't tell me you understood it. If the first thing I see is unlabelled screenshots, I've already formed an opinion, and it's not a good one.
Mistake 2: The kitchen sink build. Twenty tools installed, none of them integrated, none of them producing anything. A lab with Kali, Metasploit, Wazuh, Splunk, pfSense, and Suricata all sitting next to each other with no data flowing between them isn't a SOC. It's a shopping list. I'd rather see three tools that talk to each other than ten that don't.
Mistake 3: No "why." The build exists, the tools are real, but there's no explanation of the decision behind any of it. Why Wazuh over Splunk? Why this network topology? Why these detection rules and not others? Without the "why," I can't tell if you made choices or just followed a YouTube video step by step. Following instructions is fine at the start. It stops being impressive the moment you're asking me for a job that requires judgement.
The fix: build for a scenario, not a tool list.
Pick one attacker behaviour you want to detect. Brute force login attempts. Suspicious PowerShell execution. Lateral movement between two VMs. Then build only what that scenario needs: an attack box, a target, a way to generate and collect logs, and a rule that fires when the behaviour happens.
That's a SOC lab with three components and a clear story, and it beats a fifteen-component lab with no story every time.
The documentation approach that makes it land: write your README like an incident report, not a tutorial.
Structure it in four sections:
Objective — what attacker behaviour this lab detects and why it matters
Architecture — a simple diagram, three boxes and some arrows is enough
What I built — the specific detection rule or control, in your own words
What I'd improve — one honest limitation and what you'd do next
That last section is the one nobody includes, and it's the one that makes hiring managers stop scrolling. A candidate who can name their own lab's weakness is a candidate who thinks like an analyst, not a candidate who thinks like a student.
📰 ONE THING HAPPENING IN CYBERSECURITY THIS WEEK The labour market data circulating this month keeps landing on the same point from a different angle: the entry-level bar has quietly moved from "do you have a certification" to "can you do one narrow slice of real work." Recruiters and analysts are describing 2026 hiring in terms of alert review, cloud hygiene, identity administration, and log enrichment rather than job titles.
What this means for you: stop trying to build a lab that proves you could do the whole job. Build a lab that proves you can do one slice of it well. A three-component detection lab that proves you can review and tune alerts is worth more right now than a sprawling build that proves nothing specific.
🛠️ FREE TOOL OF THE WEEK: Velociraptor What it is: A free, open-source endpoint monitoring and digital forensics tool used for live incident response and threat hunting at scale.
Why it matters: Velociraptor is what real DFIR teams reach for when they need to query hundreds of endpoints at once during an investigation. Having it in your lab tells me you're thinking beyond "detect an alert" and into "investigate what happened after."
Where to get it: docs.velociraptor.app — the quickstart deploys a server and a single client agent on a VM in under 20 minutes.
What to do with it: Deploy the server, connect it to your existing lab endpoint, and run a hunt for a specific artefact, like recently executed processes or persistence mechanisms. Compare what Velociraptor shows you against what your Wazuh SIEM alerted on.
Portfolio move: Document the gap between what your SIEM flagged and what your endpoint investigation actually found. That gap, and your explanation of it, is a more advanced portfolio piece than almost anything else you can show at this stage.
💡 CAREER ADVICE FROM THE HIRING TABLE Here's something most people never think to ask: how long did your lab take you to build?
If the honest answer is "a weekend," say that. Don't inflate it. I'm not scoring you on hours spent. I'm scoring you on whether you can explain what you built and why. A tight, well-documented weekend build with a clear scenario beats a six-month sprawling build with no story, every time.
The candidates I remember aren't the ones with the biggest labs. They're the ones who could answer a follow-up question I made up on the spot, because they actually understood their own work.
📺 FROM THE CHANNEL THIS WEEK If this issue got you thinking about your build, the full SOC Home Lab Build Guide walks through the exact three-component detection lab described above, step by step, with the README template included.
For a wider view, the complete blueprint library covers every career path with a downloadable skill matrix, all free on the website:
→ SOC Analyst Blueprint — 6–9 months, ~£400
→ GRC Analyst Blueprint — 6–9 months, no coding required
→ Cloud Security Engineer Blueprint — 10 months, ~£715
→ DevSecOps Engineer Blueprint — 12–14 months → Penetration Tester Blueprint — 12–18 months
→ IAM Security Analyst Blueprint — 10–12 months, the secret gem nobody talks about
→ How to Secure AI — the emerging skill every professional needs
→ Interview Masterclass — the full breakdown behind last week's five questions
All at mpcybersecurity.co.uk
🎯 YOUR ONE ACTION THIS WEEK Open your GitHub repo. Pick one attacker behaviour. Rewrite your README using the four-section structure above: Objective, Architecture, What I built, What I'd improve.
If you don't have a lab yet, your action is simpler: pick the one behaviour you'd detect first, and write the Objective section before you build anything. Knowing what you're building toward before you touch a VM is the difference between a project and a shopping list.
One action. That's the deal. Every week.
🔜 COMING NEXT WEEK Issue #4: "How to Read a Cybersecurity Job Posting" — I'll decode what "3-5 years experience required" actually means in practice, which requirements are genuinely non-negotiable versus wishlist items, and how to tell from the posting itself whether you're wasting your time or genuinely in the running.
If someone you know is building their first lab, forward this email to them. It costs nothing and might save them three wasted months.
See you next week.
Marius Poskus Global VP of Cybersecurity / CISO CTRL+ALT+DEFEND
→ Skool Community: https://www.skool.com/cybersecurity-careers-guide-1773/about
→ YouTube: youtube.com/@mpcybersecurity
→ LinkedIn: linkedin.com/in/marius-poskus
→ Website: mpcybersecurity.co.uk
→ TikTok: @mariusposkus0